Generating Post thumbnails in WordPress
As I promised, im now going to share with you the new post thumbnail script that James’ Blog is using, this is the first WordPress tutorial ever posted on James’ Blog and officially starts the new WordPress tutorial category! In this tutorial you’ll be learning how to combine PHP and metadata to create unqiue post thumbnails which can be defined in the Manage post section of WP-Admin
A side note before we begin, I would like to thank Fire G from Fire Studios for telling and showing me how to use this script. A example of a version of this script can be found on his site, so if you want a live preview of the script in action click on Fire Studios!
Step 1: Making sure your WordPress theme is writable
Before we even do anything you will need to make sure you can modify your WordPress theme within the Theme Editor. From the homepage of your WordPress Admin to Design, Theme Editor and choose your currently active theme (Or a theme you want to implement this script on) Click on any of the pages on the navigation bar that is produced and scroll to the bottom.
If you see a nice shiny update button then you can skip this step. If you see a message like:
“You need to make this file writable before you can save your changes. See the Codex for more information.”
This means your theme files are not writable and you can not make changes to them within wp-admin. To fix this you must CHMOD your theme files to 666, WordPress have a nice guide on doing this already so why not head over to the URL below to find out more:
http://codex.wordpress.org/Changing_File_Permissions
Step 2: Placing the PHP code
Now there we’re all up to speed we can now begin implementing this script into your WordPress theme. Using the theme editor within WordPress admin select your index.php page on the navigation:
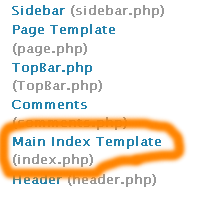
We now need to locate this part of the index.php page on your editor:
<div class="post">
<div class="post-title">
<h2>
<?php if (function_exists('get_cat_icon')) get_cat_icon(); ?><a href="<?php the_permalink() ?>" rel="bookmark" title="Permanent Link to <?php the_title_attribute(); ?>"><?php the_title(); ?></a></h2>
<span class="post-dates"><?php the_time('F jS, Y') ?></span><?php if (is_page()) { } else { ?><span class="post-cat"><?php the_category(', ') ?></span><?php } ?> <span class="post-comments"><?php comments_popup_link('No Comments', '1 Comment', '% Comments'); ?></span> </div>
<div class="entry">
<?php the_content('Read the rest of this entry &amp;amp;amp;amp;amp;amp;amp;raquo;'); ?>
</div>
</div>
Because there are so many different themes, structure and divs may look different, but the php elements should be nearly the same for any theme, scan through your index.php and locate the same area. We are now going to place this code:
<img src="<?php $values = get_post_custom_values("post-image"); echo $values[0]; ?>" alt="post-thumb" class="post-image" width="150" />
In between the div that all article content goes, so for me it would be here:
<div class="entry">

<img src="<?php $values = get_post_custom_values("post-image"); echo $values[0]; ?>" alt="post-thumb" class="post-image" width="150" />
(You may want to remove the width attribute in the image code and define it later on)
Your div may not be called entry, but look out for the similar structure, and you should find where to place the code in your index.php file.
Now that you’ve placed the code you can now click Update file, which will save the changes.
Note: You now may notice on your WordPress website that you’ll suddenly have Red X’s appearing above any arcticles on the front page. Don’t worry about them this is infact good as it shows the script working (In a sense) but it’s not configured yet. If you don’t see any changes like this it may be the fact that your browser doesn’t display Broken images and will simply hide the broken Red X sign. If you use internet explorer this will display broken images with a Red X so if your not already go check out your WordPress site in Internet Explorer.
Step 3: Your page.php file
Our post thumbnail script will also be appearing in pages, this step is not neccersary if you want thumbnails to be appearing on pages, however If you want to exclude pages from having the thumbnails follow this step.
Some wordpress themes include the page.php file and some don’t depending on if you have one or not you will still need to update it, if you have one it will show up in the theme editor on the navigation bar:
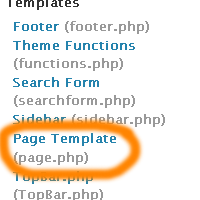
If you don’t see this link on your navigation bar then you will need to create it yourself. You can do this by simply opening a text editor (Make sure format is not set to a .txt) saving it as page.php and the uploading it to your relative theme directory which could be something like this:
http://www.yoursite.com/wp-content/themes/my-theme/
(Remember to make sure that the page.php file is also CHMOD to 666. Refer back to step one if you need help on doing it)
Now the page.php file should appear in your theme editor’s navigation bar. Click on it and you should be presented with a blank white space ready for you put something in. Basically all you need to add into the page.php file is all the code in the index.php file but without our additional script that we’ve added in. So copy the entire code within the index.php to the page.php file but exclude this code in the page.php:
<img src="<?php $values = get_post_custom_values("post-image"); echo $values[0]; ?>" alt="post-thumb" class="post-image" width="150" />
You have now excluded post thumbnails from any page on your WordPress site
Step 4: Adding your post thumbnail
Now that we’re all set with the coding and everything we can now begin to add thumbnails to posts that you create. So you will now need to go to your WordPress admin panel and select manage (You can also do this by creating a new post either method is fine) Find a post you want to add a post thumbnail to. Then scroll down to the custom field menu here:
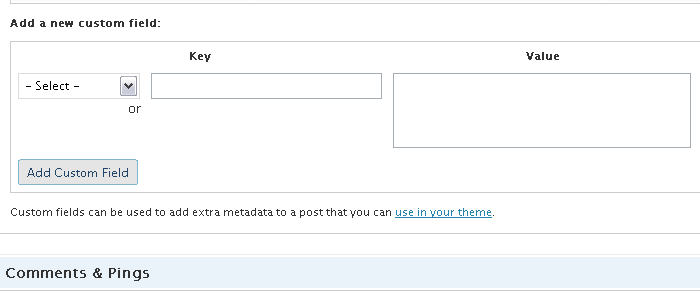
The custom field will define what image is being shown for that post. To define the image correctly you will simply have to specifiy the key set in php script that we placed in the index.php. The key is post-image however on the drop down menu to left of the key field the key post-image should already be in there. WordPress did take a bit of time to recongise the new key so it may not be showing up for some of you, and if all else fails take note of the text box to the right of it.
How to add a image:
1. Select the post-image key from the drop down menu, or type post-image in the key field.
2. In the value field you will need to specify the directory of where the image is located and the image name itself
Here’s my example:
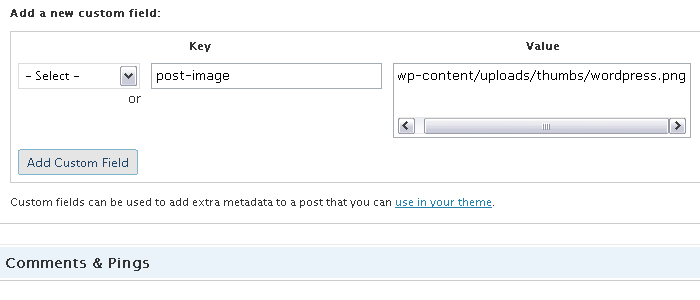
My thumbnail image is located within a directory called thumbs which is in the URL path of:
http://blog.jmwhite.co.uk/wp-content/uploads/thumbs/wordpress.png
You don’t need to include the web address in the value field just the directories. Once you’ve set up the custom field click the add custom field button and it will attach it to the post. Scroll back up and click the save button (The button within the Publish status box)
Step 5: Style your thumbs up a bit!
You have successfully added a post thumb to your post. Go check it out by viewing your blog! But wait? How do you get it to be positioned so text wraps around it? Why with the magical works of CSS of course. The post-image is a key, but it is also the name of the div you need to customize it. And this can be done by adding this code into your WordPress themes main stylesheet:
.post-image{
float:right;
padding:5px 5px 5px 5px;
margin-left:3px;
background-color:#e8e8e8;
border:1px solid #bed0ec
}
This is customization of the post thumbnails to make it look like how it is on this site. The float attribute is important as this is the magical that makes the thumbnails nicely wrapped up within the text. You can change this to left or right, depending on what positioning you like best. Other minor attributes like background color and padding are personal choice and I’ll let you to decide what there going to be.
So there we have it, a small script that does a big job and once more without the use of a wordpress plugin!
